MAIMEIMI CX8005B
MAIMEIMI 0-6000 RPM Tachometer Gauge (Model CX8005B) Instruction Manual
For 1-10 Cylinder Diesel and Gasoline Engines
1. Úvod
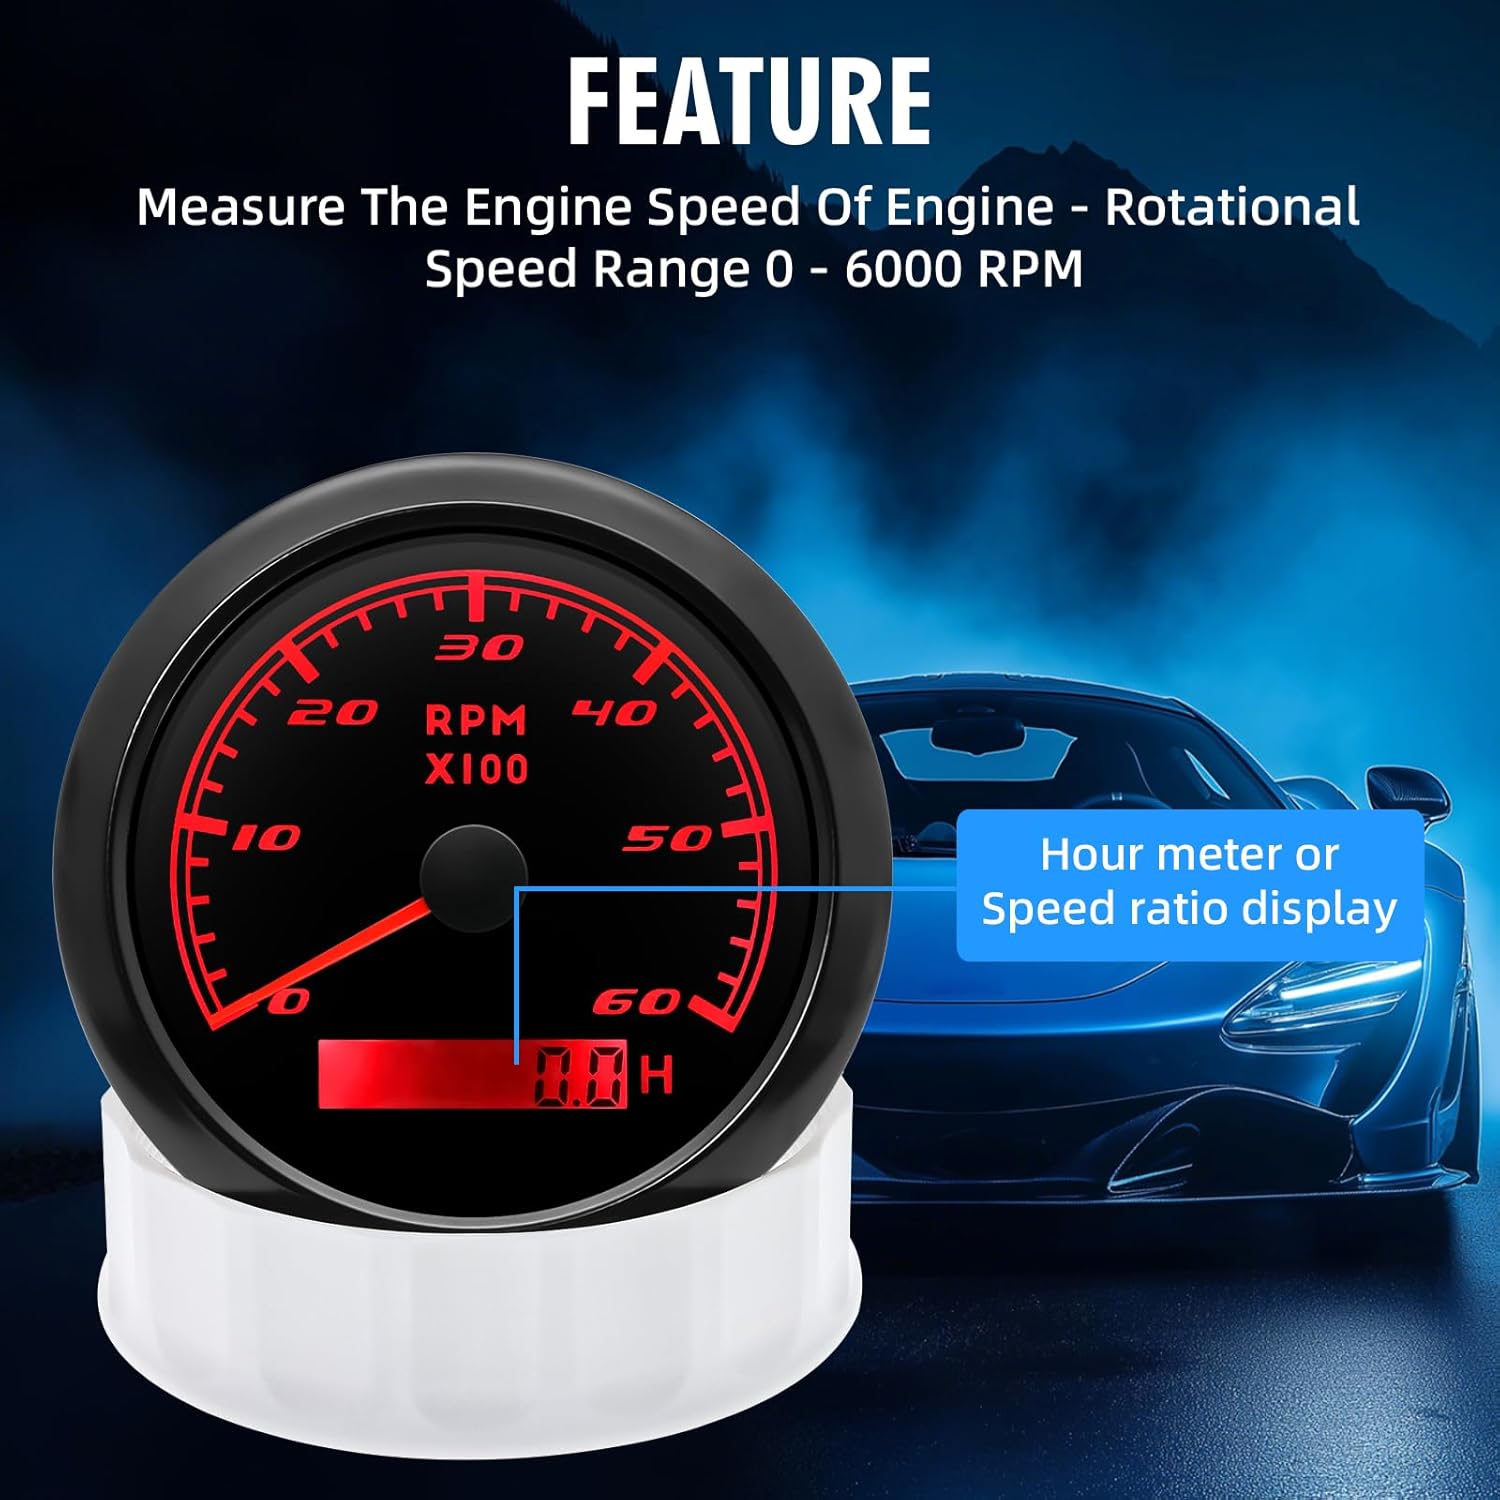
This manual provides detailed instructions for the installation, operation, and maintenance of your MAIMEIMI 0-6000 RPM Tachometer Gauge. This 85mm (3-3/8") gauge is designed to accurately display engine RPM and includes an hour meter function. It is compatible with a wide range of vehicles, including cars, trucks, boats, and other marine applications, supporting 1-10 cylinder diesel and gasoline engines.
The gauge features a durable stainless steel construction, curved tempered glass, and an HD screen for excellent readability. It is also IP67 waterproof, dustproof, and anti-fogging, ensuring reliable performance in various environments.

Image: MAIMEIMI Tachometer Gauge demonstrating universal compatibility with 12V and 24V systems, suitable for various vehicles including boats, cars, buses, and RVs.
2. Vlastnosti produktu
- Priemer: 3-3/8" (85mm) with a black dial, displaying RPM from 0 to 6000.
- Kompatibilita motora: Designed for 1-10 cylinder gasoline and diesel engines.
- Počítadlo hodín: Integrated hour meter provides an accurate record of engine running time, with a range of 0-99999.9 hours.
- Vysokokvalitná konštrukcia: Made from stainless steel with curved tempered glass for durability.
- Displej: HD screen ensures excellent readability in various lighting conditions.
- Ochrana životného prostredia: IP67 waterproof, dustproof, and anti-fogging performance.
- Podsvietenie: Features 7 adjustable backlight colors: red, green, blue, white, yellow, cyan, and purple.
Obrázok: Podrobný view of the MAIMEIMI Tachometer Gauge, highlighting the RPM scale and the integrated digital hour meter.

Image: The MAIMEIMI Tachometer Gauge shown partially submerged in water, illustrating its IP67 waterproof capability.
3. Obsah balenia
Po otvorení balenia skontrolujte, či sú všetky komponenty prítomné a nepoškodené:
- 1 x MAIMEIMI Tachometer Gauge
- 1 x káblový zväzok
- 1 x Návod na obsluhu (tento dokument)

Image: The complete package contents, including the tachometer gauge, wiring harness, and instruction manual.
4. Návod na inštaláciu
Follow these steps for proper installation of the tachometer gauge:
- Pripravte si panel: Before installation, create a hole with a diameter of 85mm (3-3/8 inches) in your dashboard or panel. Ensure there is sufficient space behind the panel (approximately 55mm backyard depth) for the gauge and wiring.
- Vložte meradlo: Carefully insert the tachometer gauge into the prepared hole.
- Secure the Gauge: Use the provided mounting ring or screws to firmly secure the gauge in place.
- Zapojenie: Connect the wiring harness according to the diagram in Section 5.

Image: Installation diagram illustrating the process of cutting an 85mm hole in the panel and securing the gauge.
5. Schéma zapojenia
Pripojte káblový zväzok nasledovne:
- 1. Black Wire: Pripojenie k zemi (-)
- 2. Red Wire: Connect to 9-32VDC Power Supply (+)
- 3. Blue Wire: Connect to RPM Signal Input
- 4. Yellow Wire: Connect to Backlight Power (+)
- 5. White Wire: NC (nepripojené)
Image: Wiring diagram indicating the correct connections for the tachometer gauge.
6. Speed Ratio Setting
The tachometer requires a speed ratio setting to accurately display RPM based on your engine's cylinder count or outboard poles. This setting is crucial for correct operation.
- Zadajte režim nastavenia: Press and hold the rubber button on the backside of the gauge for more than 3 seconds. The gauge will enter setting mode. If no action is taken for 3 seconds, it will exit setting mode.
- Upraviť hodnotu: While in setting mode, each short press of the button will increase the speed ratio value. Press and hold the button to decrease the value. The minimum step value is 0.1, and the adjustable range is 1.0-360.
- Uložiť nastavenie: Once the desired speed ratio value is displayed, release the button. The tachometer will automatically save your setting after 3 seconds. If the setup is not satisfactory, repeat the process.
Speed Ratio Reference Table:
Use the following table as a general reference. Note that this table provides common values; actual requirements may vary. If your engine cylinder number is not listed or you require further assistance, please contact customer support for a suitable speed ratio value.
| Outboard Poles | Pomer rýchlosti | Inboard or Gas Engine Cylinders | Pomer rýchlosti | Diesel Engine Gear Number | Pomer rýchlosti |
|---|---|---|---|---|---|
| 4 | 2 | 4 | 2 | Prevodovka 1 | Číslo prevodového stupňa |
| 6 | 3 | 6 | 3 | Prevodovka 2 | Číslo prevodového stupňa |
| 8 | 4 | 8 | 4 | ... | ... |
| 10 | 5 | 10 | 5 | Prevodovka 10 | Číslo prevodového stupňa |
| 12 | 6 | 12 | 6 |
Image: Speed ratio setting reference table and instructions for adjusting the gauge.
7. Prevádzka
7.1 RPM Display
Once correctly installed and configured with the appropriate speed ratio, the gauge will display the engine's rotational speed in RPM (Revolutions Per Minute) via the needle. The scale ranges from 0 to 6000 RPM.
Merač 7.2 hodín
The integrated digital display at the bottom of the gauge functions as an hour meter, recording the total operating time of the engine. This value is stored even when power is off. The hour meter range is 0-99999.9 hours.
7.3 Nastavenie podsvietenia
The tachometer features 7 backlight colors. To change the backlight color, locate the color change button on the backside of the gauge (refer to the diagram in Section 5). Each short press of this button will cycle through the available colors: red, green, blue, white, yellow, cyan, and purple.

Image: The tachometer showcasing its 7 adjustable backlight colors and indicating the position of the color change button on the rear.
Video: Official product video demonstrating the 7-color backlight feature of the MAIMEIMI 6000RPM Tachometer.
8. Špecifikácie
| Špecifikácia | Detail |
|---|---|
| Značka | MAIMEIMI |
| Číslo modelu | CX8005B |
| Materiál | Nerezová oceľ, tvrdené sklo |
| Rozmery položky (D x Š x V) | 3.8 x 3.5 x 2.2 palca (97 mm x 85 mm x 56 mm) |
| Hmotnosť položky | 8 uncí |
| Rozsah otáčok | 0-6000 ot./min |
| Hour Meter Range | 0-99999.9 hodiny |
| Farby podsvietenia | 7 (Red, Green, Blue, White, Yellow, Cyan, Purple) |
| Hodnotenie vodotesnosti | IP67 |
| Prevádzkový zvtage | 9-32V DC |
9. Riešenie problémov
- Meradlo sa nezapína:
- Check the red wire connection to the 9-32VDC power supply.
- Verify the black wire connection to ground.
- Ensure the power source is active and within the specified voltage rozsah.
- RPM Reading Incorrect or Stuck:
- Re-check the blue wire connection to the RPM signal input. Ensure it is securely connected and receiving a signal.
- Verify the speed ratio setting (refer to Section 6). An incorrect speed ratio is a common cause for inaccurate RPM readings. Adjust the speed ratio according to your engine's cylinder count or outboard poles.
- If the gauge is stuck at maximum RPM, it often indicates an incorrect speed ratio setting or an issue with the signal input. Try adjusting the speed ratio.
- Nefunguje podsvietenie:
- Check the yellow wire connection to the backlight power supply.
- Ensure the color change button on the backside of the gauge is functioning.
- Hour Meter Not Recording:
- The hour meter operates when the gauge is powered. If the gauge is on but the hour meter is not advancing, ensure the RPM signal is being received correctly.
10. Údržba
The MAIMEIMI Tachometer Gauge is designed for durability and requires minimal maintenance. Follow these guidelines to ensure its longevity:
- Čistenie: Použite mäkký, damp cloth to clean the gauge face and body. Avoid abrasive cleaners or solvents, as these can damage the tempered glass or housing.
- Spojenia: Periodically inspect all wiring connections to ensure they remain secure and free from corrosion. Loose connections can lead to intermittent operation or inaccurate readings.
- Ochrana životného prostredia: While the gauge is IP67 waterproof, prolonged exposure to extreme conditions or direct high-pressure water jets should be avoided to prevent potential damage.
- Ukladací priestor: If the vehicle or vessel is stored for an extended period, ensure the gauge is kept in a dry, stable environment.
11. Záruka a podpora
For warranty information or technical support, please refer to the contact details provided with your purchase or visit the official MAIMEIMI webstránky. Uschovajte si doklad o kúpe ako doklad o kúpe pre prípadné reklamácie.
MAIMEIMI is committed to providing high-quality automotive components. If you encounter any issues not covered in this manual, please do not hesitate to reach out to our customer service team for assistance.
You can find more information about MAIMEIMI products and support at: MAIMEIMI Store on Amazon
Ask a question about this manual
Ask about setup, troubleshooting, compatibility, parts, safety, or missing instructions. Manuals+ will review the question and use this page’s manual context to help answer it.